DIY Queen Captains Bed: A Guide to Creating a Storage-Savvy Sleeper
A queen-sized captains bed offers a unique solution for maximizing space in a bedroom. The built-in storage beneath the bed, often accessed by a lift-up mechanism, provides a convenient place to store away seasonal clothing, linens, books, or any other items you wish to keep out of sight. While pre-made captains beds are available, crafting your own DIY version allows for greater customization and potential cost savings. This guide will walk you through the steps involved in building a queen captains bed, providing insights into the materials, tools, and techniques necessary for success.
Planning Your DIY Queen Captains Bed
Before embarking on the construction process, careful planning is crucial. Consider these key aspects:
-
Bed Size and Features:
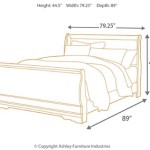
Determine the exact measurements for the queen-sized bed frame, including the desired height and the dimensions of the storage compartment. Decide on the type of lift-up mechanism you prefer, such as a gas-assisted lift or a manual hinge system. -
Storage Requirements:
Assess the amount of storage space you need. Consider the items you intend to store and their sizes. This will help determine the depth and width of the storage compartment. -
Material Selection:
Choose suitable materials for the bed frame, storage compartment, and lift-up mechanism. Wood, metal, and plywood are common choices, each offering different strengths and aesthetics. -
Design and Style:
Decide on the overall style and design of the bed. Do you prefer a simple, modern look or a more ornate, traditional design? Visualize the bed in your bedroom environment and make choices accordingly.
Once you have a clear plan, create detailed sketches or drawings with measurements to guide you during the construction process. Consider using a computer-aided design (CAD) program for more accurate representations.
Essential Tools and Materials for Construction
Building a DIY queen captains bed will require a set of tools and materials. Here's a comprehensive list to guide you:
-
Power Tools:
- Circular saw or table saw for cutting wood
- Drill with various drill bit sizes
- Sander for smoothing surfaces
- Screwdriver with various bits
- Jigsaw for cutting intricate shapes
-
Hand Tools:
- Hammer
- Measuring tape
- Level
- Wood chisels
- Clamps
-
Materials:
- Wood for bed frame, storage compartment, and slats
- Plywood for the base of the storage compartment
- Hardware: screws, nails, hinges, metal brackets, gas-assisted lift system or manual mechanism
- Wood glue
- Stain or paint for finishing
- Protective sealant (optional)
Ensure you have access to safe, well-ventilated space for building the bed. It's advisable to wear appropriate safety gear such as eye protection, dust masks, and gloves.
Construction Stages for Your DIY Queen Captains Bed
Building a queen captains bed involves several distinct stages. Here's a breakdown of the typical process:
-
Constructing the Bed Frame:
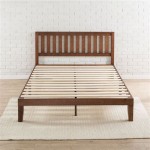
This involves cutting and joining wood to create the headboard, footboard, and side rails. Ensure the pieces are cut to the correct dimensions and assembled securely using screws, nails, and wood glue. The bed frame should be strong and sturdy enough to support the weight of the mattress and occupants. -
Building the Storage Compartment:
Create a frame for the storage compartment using wood or plywood. The compartment should be spacious enough to accommodate the intended items and be secured to the bed frame. Consider adding dividers or shelves within the compartment for better organization. -
Installing the Lift-Up Mechanism:
Choose a gas-assisted lift or a manual hinge system based on your preference and budget. Attach the chosen mechanism to the storage compartment and the bed frame according to the manufacturer's instructions. This process may involve attaching brackets, hinges, and gas springs. -
Adding Support Slats:
Install slats across the bed frame to provide support for the mattress. These slats can be made of wood or a slat system, ensuring even weight distribution and a comfortable sleeping surface. The slats should be secured to the bed frame using screws or brackets. -
Finishing Touches:
Sand the entire bed frame and storage compartment to achieve a smooth finish. Apply a protective sealant to prevent wear and tear. Finally, apply a stain or paint to the desired color or finish, adding a personal touch to your creation.
Throughout the construction process, take your time, double-check measurements, and ensure all joints are sturdy and secure. You may want to seek assistance from a more experienced DIYer or woodworker for certain steps if you are unsure about your skills.

How To Build A Diy Full Size Captain S Bed With Storage

How To Build A Diy Full Size Captain S Bed With Storage

How To Build A Rustic Farmhouse Style Captains Bed With Drawers

Captain S Bed Woodworking Blog Plans How To

Pin On Home Ideas

Full Storage Captains Bed Ana White

Diy Full Or Queen Size Storage Bed Shanty 2 Chic

How To Build A Captain S Bed From Two Dressers 10 Steps Captains Dresser Murphy Plans

How To Build A Captain S Bed From Two Dressers 10 Steps

Captain S Bed Assembly Instructions
Related Posts