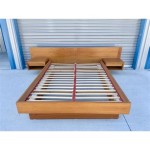
Building Bunk Bed Plans: Twin Over Queen
A twin over queen bunk bed offers a unique and space-saving solution for bedrooms with multiple occupants. This configuration provides ample sleeping space while maximizing floor area. Building your own bunk bed can be a rewarding project, allowing you to customize the design and create a personalized piece of furniture. This article provides a comprehensive guide to building bunk bed plans for a twin over queen configuration, outlining the necessary steps, materials, and considerations.
Step 1: Design and Planning
Before embarking on construction, careful planning is crucial. Determine the dimensions of the bunk bed, considering the available space in the bedroom and the desired height. The queen-sized mattress will require a larger frame than the twin, so ensure sufficient clearance for both beds. The height of the top bunk should be safe for the intended occupant, with adequate headroom and protection from falls. Additionally, consider the style and aesthetic of the bunk bed, including the desired wood type, finish, and any additional features, such as built-in storage or ladders.
Create detailed plans with accurate measurements and diagrams. These plans will serve as a blueprint for the construction process. Utilize software programs specifically designed for woodworking or hand-drawn sketches with precise dimensions. Ensure the plans account for all components, including the frame, support beams, slats, ladder, and any decorative elements. Consider using pre-cut lumber from a home improvement store to simplify the process and ensure consistency.
Step 2: Material Selection and Preparation
Choose high-quality, durable wood for the framework. Traditional wood species like pine, oak, and maple offer excellent strength and stability. Plywood is an economical option for the support beams and slats. Select lumber that is free of knots, cracks, or other defects. The strength and weight capacity of the lumber should be adequate for the size and weight of the mattresses. Check the lumber for moisture content, ensuring that it is dry and ready for construction.
Prepare the wood by cutting it to the precise dimensions specified in the plans. Utilize a saw with a sharp blade for clean cuts. Sand the edges and surfaces of the wood to smooth out any irregularities and prepare them for finishing. Depending on the desired finish, apply a primer to the wood before staining or painting.
Step 3: Frame Assembly
Begin by assembling the queen-sized frame. Construct a rectangular frame using 2x4 lumber for the sides, head, and footboards. Securely join the pieces using wood screws or pocket holes. Add additional support beams across the width of the frame for strength. Repeat the process for the twin-sized frame, ensuring that the lower frame is long enough to accommodate the queen frame and provide sufficient support.
Connect the two frames using sturdy brackets designed for bunk beds. Position the queen frame on top of the twin frame, ensuring that it is securely fastened and level. Check the alignment and stability of the entire structure before proceeding to the next step.
Step 4: Adding Slats and Support Systems
Install the slats, which serve as a base for the mattresses. Use a spacing of 2-4 inches between each slat. Attach the slats to the frame with screws or pocket holes. Consider adding additional support to the slats, such as cross-bracing or a slat support system, to ensure even weight distribution and prevent sagging.
For the top bunk, install a guardrail around the perimeter to prevent the mattress from sliding off. Secure the guardrail to the frame with screws or pocket holes. Ensure that the guardrail is high enough to prevent children from falling out. The ladder can be constructed separately and attached to the side of the bunk bed, using a combination of screws, brackets, and steps.
Step 5: Finishing and Installation
Sand the entire bunk bed frame and remove any rough edges. Apply a stain or paint to the wood, following the manufacturer's instructions. Allow the finish to dry completely before installing the mattresses and bedding.
Install the bunk bed in the desired location, making sure it is level and stable. Check for any loose parts or instability. Once the bunk bed is safely installed, enjoy a comfortable and spacious sleeping arrangement.

Modular Bunk Bed Setup Woodworking Blog S Plans How To Diy Cool Beds

Simple Bunk Bed Plans Twin Over Full Ana White

17 Easy Steps For A Diy Built In Bunk Bed Start At Home Decor

Farmhouse Style Twin Over Full Bunk Bed Plans Her Tool Belt

17 Easy Steps For A Diy Built In Bunk Bed Start At Home Decor

Custom Made Twin Over Full Bunk Bed I Don T Like The Posts Going All Way Up D Ladder Built Into Plans Beds

68 Amazing Diy Bunk Bed Plans

Diy Built In Bunk Beds Lauren Koster Creative

Twin Over Queen Bunk Bed Free Woodworking Plan Com

30 Free Diy Loft Bed Plans For Kids And S Blitsy
Related Posts