DIY Queen Size Bunk Beds: Building a Dreamy Space
Queen-size bunk beds offer a practical and stylish solution for maximizing space and creating a unique sleeping environment. Whether you're looking to accommodate guests, siblings, or simply create a more dynamic bedroom layout, DIY queen-size bunk beds present an exciting project that can be tailored to your specific needs and preferences. This article explores the process of constructing these impressive structures, highlighting the key steps involved in bringing your vision to life.
1. Planning Your Queen-Size Bunk Beds
Before launching into the construction process, careful planning is essential for a successful DIY project. This involves considering various factors to ensure your bunk beds are safe, functional, and aesthetically pleasing.
First, determine the intended use of the bunk beds. Are they for adults or children? This will influence design elements such as bed height, ladder placement, and safety features. Next, measure the available space to ensure the beds will fit comfortably and allow sufficient room for movement and access.
The design of the bunk beds is another crucial aspect of the planning process. You can choose from various styles, including traditional, modern, or rustic, each with its own distinct aesthetic appeal. Incorporating personal touches such as decorative elements, different materials, or unique paint schemes adds character and individuality to your creation.
Consider purchasing pre-made bunk bed plans or consulting with a professional designer to gain valuable insights and guidance. These resources can provide blueprints, material lists, and assembly instructions, simplifying the project and minimizing potential errors.
2. Gathering the Necessary Materials and Tools
Once the design is finalized, it's time to gather the necessary materials and tools. This includes selecting high-quality lumber for the bed frame, ladders, and support systems. Consider using materials that are durable and resistant to wear and tear, especially for high-traffic areas. Additionally, invest in hardware such as screws, bolts, brackets, and connectors to ensure secure and stable construction.
The required tools may vary depending on the complexity of the design. However, essential tools include a saw, drill, measuring tape, level, hammer, screwdriver, and safety gear such as gloves and eye protection.
Creating a detailed materials list and tool inventory will ensure you have everything on hand, preventing delays and unnecessary trips to the hardware store.
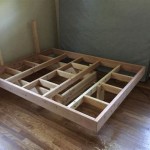
3. Assembling the Queen-Size Bunk Bed Frames
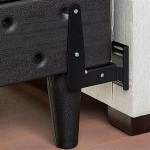
The assembly process involves building the individual bed frames that form the foundation of the bunk beds. This step requires precision and careful attention to detail to ensure the beds are sturdy and properly aligned. The frames typically consist of a headboard, footboard, side rails, and slats for supporting the mattress.
Start by cutting the lumber according to the dimensions specified in the plans. Use a saw to make clean, accurate cuts and ensure all pieces are free of any imperfections. Pre-drill holes before fastening the pieces together to prevent wood splitting and ensure a secure fit. Use appropriate screws and bolts, ensuring they are properly tightened for maximum stability.
When assembling the frames, align the pieces precisely to ensure they are square and level. Regularly check for alignment with a level throughout the construction process. Take your time and work carefully, ensuring all joints are secure and stable.
4. Building the Ladder and Additional Features
Once the frames are complete, the next step is to construct the ladder, which provides access to the upper bunk. Design the ladder to be sturdy, comfortable, and safe. Consider using sturdy materials such as hardwood or metal and ensure the rungs are spaced appropriately for easy climbing.
For additional features, you can choose to incorporate safety rails, storage compartments, or other elements that enhance functionality and aesthetics.
Safety rails are essential for preventing falls from the upper bunk, especially for children. Consider installing them on both sides of the bed and ensuring they are securely fastened to the frame.
Storage compartments can add practicality and organization to your bunk beds. These can be built into the bedframe, underneath the lower bunk, or incorporated as separate units.
5. Finishing Touches and Customization
Once the structural elements are complete, the final step involves adding finishing touches and personalizing your bunk beds. This includes sanding, painting, or staining the wood to achieve the desired aesthetic. You can choose from various colors and finishes to complement your bedroom décor.
Consider adding decorative elements such as moldings, trim, or custom painted designs. You can also incorporate lighting fixtures, such as reading lights or nightlights, to enhance functionality and ambiance.
The customization possibilities are endless, allowing you to create bunk beds that perfectly reflect your style and preferences.
Creating your own queen-size bunk beds allows you to personalize the design, choose durable materials, and enjoy the rewarding experience of building a unique and functional piece of furniture. Remember to prioritize safety, functionality, and aesthetics throughout the process. With careful planning and execution, you can create a stunning and practical addition to your home that will be enjoyed for years to come.

17 Easy Steps For A Diy Built In Bunk Bed Start At Home Decor

How To Build An Easy Diy Queen Size Loft Bed For S Thediyplan

Free Diy Furniture Plans How To Build A Queen Sized Low Loft Bunk Bed The Design Confidential

Easy Diy Loft Bed With A Desk Queen Size Plans For S

17 Easy Steps For A Diy Built In Bunk Bed Start At Home Decor

Queen Builtin Bunks Reveal Honey Built Home

How To Build A Built In Bunk Bed Plank And Pillow

Multifunctional Queen Size Bunk Bed With Storage Area Plan

17 Easy Steps For A Diy Built In Bunk Bed Start At Home Decor

How To Build A Diy Queen Size Loft Bed With Desk Thediyplan
Related Posts