Green Forest Queen Bed Frame Instructions
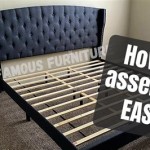
Assembling furniture can often be a daunting task. Clear instructions are crucial for a smooth and successful assembly process. This article aims to provide a comprehensive guide to assembling the Green Forest Queen Bed Frame, offering clear and detailed steps for each stage of the process.
1. Inventory and Preparation
Before commencing the assembly, it is essential to carefully inventory all components. Refer to the provided parts list and ensure all pieces are present and undamaged. Missing or damaged parts should be reported to the manufacturer immediately. Lay out all the components in a spacious, well-lit area to facilitate easy access and organization during the assembly process. Gather necessary tools, which are typically listed in the instruction manual. Having the correct tools readily available will streamline the assembly.
2. Headboard Assembly
The headboard assembly typically forms the first stage of the process. Begin by identifying the headboard panels and connecting hardware. Align the panels according to the instructions, ensuring correct orientation. Secure the panels together using the provided screws, bolts, or cam locks. Tighten all connections firmly, but avoid over-tightening, which could damage the materials. If the headboard includes additional features like slats or supports, attach these as per the instructions.
3. Footboard Assembly
The footboard assembly often mirrors the headboard assembly process. Identify the footboard panels and connecting hardware. Align the components according to the diagrams in the instruction manual, ensuring correct positioning. Secure the footboard panels together using the appropriate hardware, firmly tightening all connections. Again, avoid over-tightening, which could strip the screws or damage the wood. Attach any additional support components as directed by the instructions.
4. Side Rail Attachment
With the headboard and footboard assembled, the next step involves attaching the side rails. Identify the side rails and locate the corresponding connection points on the headboard and footboard. Align the side rails with these connection points and secure them using the provided hardware. Ensure all connections are firmly tightened to provide stability to the frame. Double-check the alignment of the side rails to ensure they are flush with the headboard and footboard.
5. Slat Installation
Slats provide support for the mattress and are essential for proper weight distribution. Identify the slats and their designated position within the bed frame. Most Green Forest bed frames utilize a system where the slats are simply laid across the side rails, within pre-designed supports or grooves. Ensure the slats are evenly spaced and securely placed within the frame. Some models might require center support legs, which should be attached at this stage, following the instructions provided. Attaching the center support legs typically involves connecting them to a center rail and/or the side rails for added stability.
6. Final Checks and Adjustments
Once all components are assembled, conduct a thorough inspection to ensure all connections are secure and the frame is stable. Gently shake the frame to check for any wobbling or loose parts. Tighten any loose connections as needed. Refer to the instruction manual for any specific adjustments that might be required for your particular model. Some models have adjustable height settings or other features that may need to be configured.
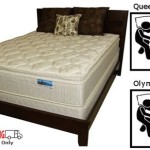
7. Mattress Placement
With the frame fully assembled and inspected, the final step is placing the mattress on the frame. Carefully lift the mattress and position it evenly on the slats. Ensure the mattress is properly centered and aligned within the frame. The mattress should fit snugly within the frame without significant gaps. After placing the mattress, add bedding and pillows as desired. The bed frame is now ready for use.
By following these steps carefully and referring to the provided instruction manual, the assembly of the Green Forest Queen Bed Frame should be a straightforward process. Careful attention to detail and proper execution of each step will ensure a stable and secure bed frame ready for years of comfortable use.
Remember to always consult the official instruction manual provided with your specific Green Forest Queen Bed Frame model, as minor variations may exist between different versions. This guide provides a general overview of the assembly process, but the provided instructions with your specific model should always be the primary reference.

Greenforest Metal Bed Frame Full Size 10 Legs Mattress Foundation Promo

Amolife Queen Size Velvet Upholstered Platform Bed Frame With Curved Headboard Green Com

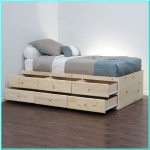
Platform Storage Bed No Headboard Get Laid Beds

Crafted By Hand Made For You Laurel Bed The Citizenry

Garland Fabric Ottoman Bed Aspire

Solid Handmade Beds And Bed Frames Get Laid

Low Fuji Attic Platform Wooden Bed Frame By Get Laid Beds

This Forest Green Bedroom Plays Perfectly With The Balance Of Colour And White Throw Nods To Statement Modern Home

Bed Frames

Diy Modern Rustic Bed Frame Build Plans Based On The West Elm Alexa Green Willow Homestead
Related Posts