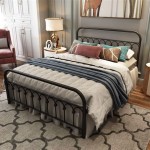
How to Build a Platform Bed with Lift-Up Storage
A platform bed with lift-up storage offers a practical and stylish solution for maximizing space in a bedroom. By concealing storage beneath the bed frame, you can neatly tuck away bedding, seasonal items, or other belongings, keeping your room organized and clutter-free. This project might seem daunting, but with the right plan and step-by-step instructions, building a platform bed with lift-up storage is achievable for even novice DIYers.
1. Planning and Preparation
Before diving into the construction, careful planning is crucial. First, consider the dimensions of the bed based on your mattress size and available space in the bedroom. Next, determine the desired height of the platform, taking into account accessibility and your personal preferences. The storage mechanism should be designed to accommodate the weight of the items you plan to store. This might involve researching different lift systems, such as gas struts or hydraulic lifts.
Once you finalize the design, create a detailed list of materials and tools. This will ensure a smooth and efficient construction process. Essential materials include lumber for the frame, plywood for the platform top, storage box components, hinges, and a lift mechanism. The tools required could include a saw, drill, screwdriver, level, tape measure, clamps, and safety gear like gloves and eye protection. Don't forget to factor in the cost of materials, hardware, and any additional tools you might need to purchase.
2. Constructing the Bed Frame
The construction of the bed frame is the foundation for the entire project. Begin by cutting the lumber for the headboard, footboard, and side rails according to your measurements. You can use standard lumber sizes or customize the dimensions for a unique look. Once the pieces are cut, join them together using wood glue and screws for a secure and durable connection. Use countersinking techniques to avoid visible screw heads on the surface of the frame.
Ensure that the frame is square and level before proceeding. You can use a carpenter's square and level to check for accuracy. If necessary, adjust the joints to ensure a straight and stable frame. Once the frame is complete, attach the plywood platform top to the frame using screws driven from the underside. This creates a solid support for the mattress and provides a flat surface for the storage box to rest on.
3. Building the Storage Box
The storage box forms the compartment for your belongings. It can be constructed from plywood or other suitable materials, depending on your desired strength and aesthetic. Measure the interior dimensions of the frame and cut the plywood for the sides, bottom, and dividers. Choose a thickness that provides adequate support for the weight of your items.
Assemble the box using wood glue and screws, ensuring that the seams are tight and the corners are square. Add dividers or shelves to create compartments within the box, allowing you to organize items efficiently. Once the storage box is complete, attach hinges to the underside of the platform top, ensuring they are aligned with the hinges on the storage box.
4. Installing the Lift Mechanism
The lift mechanism is responsible for raising and lowering the storage box. Modern options include gas struts, hydraulic lifts, or manual crank systems. Gas struts provide a smooth and effortless lift, while hydraulic lifts offer a stronger lifting force. Manual crank systems are a more economical alternative but require physical effort.
Choose a lift mechanism that suits your needs and budget. Carefully follow the manufacturer's instructions for installation. Attach the lift mechanism to the underside of the platform top and the storage box, ensuring proper alignment. Test the operation of the lift mechanism to ensure it raises and lowers smoothly and safely. You can adjust the height of the lift mechanism as needed to optimize access to the storage compartment.
5. Finishing Touches
Once the essential construction is complete, you can add finishing touches to enhance the aesthetic appeal of the platform bed. Consider staining or painting the wood to create a desired color and finish. Sand the surfaces before applying any stain or paint to achieve a smooth and even application. Add decorative touches like molding or trim to enhance the visual appeal of the bed frame and storage box.
Ultimately, you can customize the bed design to fit your preferences and style. Use your creativity to incorporate unique features and textures to make the bed a focal point in the bedroom. The lift-up storage mechanism provides a practical solution for organizing your belongings, transforming a simple platform bed into a functional and stylish piece of furniture.

How To Build A Queen Size Storage Bed Addicted 2 Diy

Simple Lift Top Storage Bed Ana White

How To Build A Queen Size Storage Bed Addicted 2 Diy

Diy Storage Bed With Gas Spring Assist

Simple Lift Top Storage Bed Ana White

How To Build A Queen Size Storage Bed Addicted 2 Diy

Diy Platform Bed With Storage Frame

Queen Size Bed With Storage
:strip_icc()/102063020-3aad3b4b93404e84ae239f728901cc61.jpg?strip=all "How To Build A Platform Style Diy Bed Frame With Storage")
How To Build A Platform Style Diy Bed Frame With Storage

Diy Platform Bed With Drawers Easy To Build Beds Perfect For Any Home Diyplatformbed Platformbed Pla Frame Plans
Related Posts