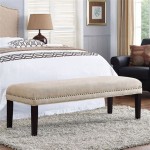
How to Build a Simple Bed Frame: Queen Size
A queen-sized bed frame is a substantial piece of furniture, and building one yourself can be a rewarding project. This guide outlines the steps for constructing a simple, sturdy queen bed frame using basic woodworking techniques. We will focus on a minimalist design featuring a headboard and footboard with a simple slat support system.
Materials and Tools
Before you begin, gather the necessary materials and tools. You will need:
- Wood: 2x4 lumber for the frame, headboard, and footboard. Choose a hardwood like oak or maple for durability. You will need approximately 10 linear feet of 2x4s for the frame, 8 linear feet for the headboard, and 6 linear feet for the footboard. Consider using pre-sanded lumber for a smoother finish.
- Slat Supports: Choose either wooden slats or metal bed slats. If using wooden slats, you will need 12-14 slats that are slightly wider than the width of your mattress. Metal bed slats are typically sold in sets that are designed for queen-sized mattresses.
- Wood Glue: Use a high-quality wood glue for strong, durable bonds.
- Screws: Wood screws, 2.5 inches long, for assembling the frame and attaching the headboard and footboard. You will need about 100 screws.
- Wood Filler: Fill any screw holes and gaps for a smooth finished surface.
- Sandpaper: Use various grit sandpaper to smooth the wood and edges.
- Stain or Paint: Choose a stain or paint that complements your bedroom decor. You will need enough to cover the entire frame, headboard, and footboard.
- Finishing Supplies: Polyurethane or varnish to protect the wood and enhance the finish.
- Safety Gear: Safety glasses, gloves, and a dust mask are essential when working with wood.
- Measuring Tape: Accurate measurements are crucial for a well-fitting bed frame.
- Level: Ensure the frame is level for stability.
- Drill: A cordless drill with various bits.
- Saw: You will need a saw to cut the lumber to size. A circular saw is ideal for straight cuts.
- Clamps: Hold the pieces together while gluing and securing.
Building the Frame
Begin with the foundation of your bed frame: the sides and the head and footboards.
- Measure and Cut: Cut the lumber for the sides of the frame. For a standard queen-sized bed, each side will be 80 inches long and 14 inches wide. Measure and cut the lumber for the headboard and footboard, leaving enough space for the mattress thickness. Typically, a headboard is about 40 inches tall, and a footboard is 18 inches tall. You may need to adjust these dimensions to fit your desired height and style preference.
- Assemble the Frame: Lay the two long side pieces parallel to each other. Use wood glue and screws to attach the head and footboard pieces. Attach these boards to the ends of the side pieces to create the rectangular frame. Ensure the pieces are square and level before securing them.
- Reinforce the Frame: For added stability, consider adding a center support beam between the head and footboard. Cut a piece of 2x4 lumber to the length of the bed frame. Position the beam in the center of the frame and attach it to the long sides with glue and screws.
Slat Support System
The slat support system provides a sturdy base for the mattress and prevents sagging. You can use either wooden slats or metal bed slats.
- Wooden Slats: If using wooden slats, cut them to a length that is slightly wider than the width of the bed. Position the slats across the bed frame, leaving a small space between each slat. You can attach the slats to the frame with screws or use slat brackets.
- Metal Bed Slats: Metal bed slats are available in sets that are designed to fit queen-sized mattresses. Follow the manufacturer's instructions to install the slats. The slats typically lock into slots along the inside edges of the frame.
Finishing Touches
Once the frame and slat system are complete, it's time to add the finishing touches.
- Sanding: Sand the entire frame and headboard/footboard using different grit sandpaper to smooth out any rough edges. Remove any sanding dust before proceeding.
- Filling: Fill any holes or gaps in the wood with wood filler. Let the filler dry completely then sand it smooth.
- Staining or Painting: If desired, stain the frame and headboard/footboard with a wood stain. Choose a stain that complements your bedroom decor. Alternatively, you can paint the frame. Apply the stain or paint evenly in thin coats and allow drying time between coats.
- Finishing: Apply a sealant, such as polyurethane or varnish, to protect the wood and enhance the finish. Apply the sealant in thin coats, allowing drying time between each coat.
Congratulations! You have successfully built a simple queen-sized bed frame. Remember to always prioritize safety and follow proper woodworking techniques.

Simple Queen Bed Frame Diy Plans

Diy Bed Frame Wood Headboard 1500 Look For 200 A Piece Of Rainbow

How To Build An Easy Bed Platform Maker Gray

2x4 Simple Modern Bed Ana White

Easy To Build Diy Bed Houseful Of Handmade

Diy Bed Frame Wood Headboard 1500 Look For 200 A Piece Of Rainbow

Essential Platform Bed Frame Ana White

Easy To Build Diy Bed Houseful Of Handmade

How To Build A Simple Bed Frame On Budget Easy Diy

2x4 Queen Bed Easy Portable