How to Convert an Antique Full Bed to a Queen Frame
Antique furniture, especially beds, often possess a unique charm and historical significance. However, the dimensions of antique furniture can sometimes be a challenge in modern bedrooms. A full-size bed, common in antique furniture, may not be large enough for contemporary comfort. Fortunately, converting an antique full bed frame to a queen size can be a rewarding project, preserving the antique's aesthetic while providing a more spacious sleeping area.
Understanding the Conversion Process
The conversion process involves essentially extending the width of the bed frame to accommodate the queen-size mattress. This typically entails adding wooden sections to the existing side rails, creating a wider platform. While the conversion might seem complex, it is a manageable DIY project with the right tools and approach.
Required Materials and Tools:
Before embarking on the conversion, gather the necessary materials and tools. The specific requirements might vary slightly depending on the bed frame's construction, but generally, you will need:
- Wood for the bed frame extension (preferably matching the existing wood type)
- Wood glue
- Wood screws (appropriate length and type)
- Screwdriver or drill
- Saw (depending on the wood type)
- Measuring tape
- Level
- Sandpaper
- Paint or stain (optional, for matching the finish)
- Queen-size mattress and box spring
Steps for Converting an Antique Full Bed to a Queen Frame:
Follow these steps to convert your antique full bed to a queen size:
Step 1: Measure and Plan
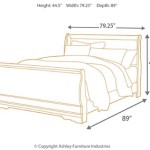
Start by carefully measuring the existing full-size bed frame. Determine the width of the frame and the distance between the side rails. Remember, a standard full-size mattress is 54 inches wide, while a queen-size mattress is 60 inches wide. Therefore, you will need to add 6 inches to the width of the frame. Consider the design of the bed frame. If it has decorative elements or intricate joinery, you might need to adjust the extension design to complement the original aesthetic. Create a detailed plan outlining the dimensions of the wooden sections you need to fabricate for the extension.
Step 2: Prepare the Extension Sections
Cut the wooden sections for the extension according to your plan. Ensure the sections are precisely cut to size using a saw or another suitable cutting tool. Use a planer or sandpaper to smooth the edges and surfaces for a seamless fit with the existing frame. If applicable, you can shape the sections to match any existing curves or contours on the side rails.
Step 3: Attach the Extension Sections
Apply wood glue to the edges of the extension sections and the existing side rails. Align the sections accurately with the frame, ensuring they are level and in alignment. Use wood screws to secure the extensions firmly to the bed frame. Stagger the screw placement and avoid overtightening to prevent splitting the wood.
Step 4: Sand and Finish
After attaching the extensions, use sandpaper to smooth the transition between the new and old sections. This removes any rough edges or inconsistencies. If desired, you can paint or stain the new extensions to match the antique finish of the existing bed frame. Allow the paint or stain to dry completely before proceeding to the next step.
Step 5: Assemble and Test
Once the extension is complete and the finish has dried, assemble the bed frame as usual, including the headboard, footboard, and any supporting legs. Test the stability of the converted frame by applying pressure to the side rails and the center portion. Make any necessary adjustments to ensure the bed frame is secure and supports the weight of a queen-size mattress and box spring.
Converting an antique full bed to a queen frame requires careful planning and attention to detail. By following these steps and using the right materials and tools, you can create a comfortable and spacious queen-size bed while preserving the charm of your antique furniture. Remember, the process may require some woodworking skills, but the results can be both aesthetically pleasing and practical.

How To Turn Your Antique Double Bed Into A Queen Happily Ever After Etc

Converting An Antique Bed To A Modern Queen Or King Size Harp Gallery Furniture Blog

How To Turn Your Antique Double Bed Into A Queen Happily Ever After Etc

Retrofitting Our Craigslist Bed Diy Custom Antique Frame

Converting An Antique Bed To A Modern Queen Or King Size Harp Gallery Furniture Blog

Convert Full Size Bed Headboard Footboard To A Queen Mattress

How To Turn Your Antique Double Bed Into A Queen Happily Ever After Etc

Converting An Antique Bed To A Modern Queen Or King Size Harp Gallery Furniture Blog

Retrofitting Our Craigslist Bed Diy Custom Antique Frame

Size Conversion Of Your Antique Double Iron Bed
Related Posts