How to Make a Horizontal Wall Bed
A horizontal wall bed, also known as a Murphy bed or a fold-down bed, is a space-saving solution that allows you to transform your living room, office, or guest room into a functional space during the day and a comfortable bedroom at night. Building a horizontal wall bed can be a challenging but rewarding DIY project. It requires careful planning, precise measurements, and a good understanding of woodworking techniques. This article provides a detailed guide on how to construct a horizontal wall bed, ensuring a smooth and successful build.
Step 1: Planning and Design
Before embarking on the construction, it is crucial to plan and design your wall bed. This involves determining the size, location, and features of your bed. Consider the following factors:
- Space available: Measure the wall space where you intend to install the bed. This will determine the maximum size of the bed frame and mattress.
- Mattress size: Choose the mattress size you require and ensure it fits properly within the bed frame.
- Storage needs: Decide whether you need storage space within the bed frame or behind the bed. This will influence the design and construction.
- Bedframe design: Select a bedframe design that complements your room décor and meets your aesthetic preferences.
Once you have a clear plan, create detailed drawings or blueprints to guide the construction process. This will help you visualize the different parts of the bed and ensure accurate measurements. Use a CAD program or sketch out the design on paper, marking important dimensions and features.
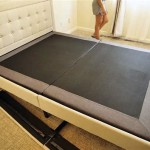
Step 2: Building the Bed Frame
The bed frame is the foundation of your wall bed, so it needs to be sturdy and well-built. The frame should be constructed from strong, durable materials such as plywood, hardwood, or engineered lumber. Follow these steps:
- Cut the frame components: Using your blueprints as a guide, cut the frame components to the exact sizes. Ensure all cuts are precise and square.
- Assemble the frame: Join the frame components using wood glue and screws. Use strong wood glue to ensure a strong bond between the components. Secure the joints with screws for additional strength.
- Reinforce the frame: Add additional support beams or braces to the frame to enhance its stability and prevent sagging. Consider using metal or wood brackets to connect these reinforcements.
- Create storage compartments: If you are incorporating storage space within the bed frame, build shelves or drawers within the frame and attach them securely. Ensure the compartments are accessible and easily fitted.
As you assemble the frame, use a level to check for squareness and ensure all components are aligned correctly. This will help ensure the bed is sturdy and the mattress fits properly.
Step 3: Incorporating the Folding Mechanism
The folding mechanism is the heart of a horizontal wall bed. This is the system that allows the bed to fold vertically against the wall and unfold for sleeping. Several types of folding mechanisms are available, each with its own advantages and disadvantages. Choose the mechanism that best suits your needs and skill level.
- Gas struts: Gas struts are the most common type of folding mechanism. They provide smooth and effortless lifting and lowering of the bed. They can be purchased from hardware stores or online retailers. Ensure the struts are rated for the weight of your bed and mattress.
- Hinges and latches: You can also use hinges and latches to create a simple folding mechanism. This requires careful calculation and installation to ensure the bed opens and closes smoothly. Consider using heavy-duty hinges and secure latches for reliable operation.
- Commercial mechanisms: Some pre-made wall bed kits come with integrated folding mechanisms. These kits can save time and effort but may be more expensive than building your own mechanism.
Attach the chosen folding mechanism to the frame and test its functionality before proceeding further. Ensure the mechanism operates smoothly and the bed folds and unfolds securely.
Step 4: Finishing the Bed
Once the frame and folding mechanism are complete, it is time to add the finishing touches to your wall bed. This involves adding the headboard, footboard, side rails, and any other desired decorative elements.
- Install the headboard: Attach the headboard to the frame using screws or other appropriate fasteners. Ensure the headboard is securely fastened and aligned with the rest of the frame.
- Add the footboard and side rails: Attach the footboard and side rails to the frame, ensuring they fit snugly and provide support for the mattress. Securely fasten them using screws or other fasteners suitable for the materials used.
- Finish the wood: Sand the bed frame and other components to create a smooth surface. Apply paint or stain to your desired color and finish. Use a quality finish to protect the wood and enhance its appearance.
- Install hardware: Attach any necessary hardware, such as handles or decorative elements. Ensure the hardware is securely fastened and functional.
After completing the finishing touches, test the folding mechanism once again to ensure everything works smoothly. Make any necessary adjustments before proceeding to the next step.
Step 5: Mounting and Installation
The final step is mounting the bed frame to the wall and installing the mattress. This requires careful planning and precise measurements to ensure the bed is level and secure.
- Mark the mounting points: Use a level to mark the mounting points on the wall where the bed frame will be attached. Ensure the marks are accurate and level to prevent the bed from tilting or being uneven.
- Install mounting brackets: Attach mounting brackets to the wall using screws or other appropriate fasteners. The brackets should be strong enough to support the weight of the bed and mattress.
- Mount the bed frame: Secure the bed frame to the mounting brackets. Ensure the frame is level and securely fastened to the wall. Use appropriate fasteners and follow manufacturer recommendations for installation.
- Install the mattress: Once the bed frame is securely mounted, place the mattress on the bed. Ensure the mattress fits properly and is securely placed within the frame.
After installing the bed, test the folding mechanism one final time to ensure everything works smoothly. Make any necessary adjustments to ensure the bed operates perfectly before using it.

15 Diy Murphy Beds How To Build A Bed

Rustic Queen Sized Wall Bed Ana White

Create A Bed Queen Horizontal Adjustable Deluxe Murphy Wall Kit Van Dyke S Rers

Create A Bed Standard Horizontal Murphy Construction Assembly Installation

15 Diy Murphy Beds How To Build A Bed

Murphy Bed Vertical Vs Horizontal

Murphy Wall Bed Hardware Diy Kit Horizontal Mount 3 Sizes Available Muebles Multiuso Camarotes En Madera Cama

Diy Horizontal Murphy Bed Woodbrew

Hardware Kit For Horizontal Mount Murphy Bed Interiors Designed Com Ideas De Cama Diseño Muebles Para Casa

3 Ways A Wall Bed Can Make Your Life Easier Beds Melbourne Geelong
Related Posts