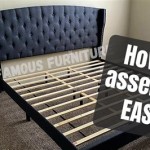
How To Make A Queen Size Wooden Bed Frame
Crafting a queen-size wooden bed frame is a project that offers a rewarding blend of creativity and functionality. By bringing together your woodworking skills and a selection of quality materials, you can build a sturdy and stylish centerpiece for your bedroom. This guide will walk you through the process of designing, constructing, and finishing a queen-size wooden bed frame, ensuring a successful and enjoyable build.
1. Design and Planning
The first step in constructing a queen-size wooden bed frame is to carefully plan the design and dimensions. Consider the following factors:
- Style: Choose a bed frame design that complements your bedroom's aesthetic, whether it's traditional, modern, minimalist, or rustic.
- Materials: Select durable and aesthetically pleasing wood types like oak, maple, cherry, pine, or walnut. Consider the wood's strength, grain patterns, and color.
- Headboard and Footboard: Determine the height and design of the headboard and footboard. Will they be simple or elaborate? Will they be upholstered?
- Slats or Box Spring: Decide whether you want to use slats for support or a box spring. Slats provide a more natural and airy feel, while box springs offer additional cushioning.
- Storage: Consider incorporating drawers or other storage features for practicality.
- Dimensions: A standard queen-size mattress measures 60 inches wide by 80 inches long. Ensure your frame dimensions accommodate these measurements.
- Tools and Equipment: Gather the necessary tools, including saws, drills, sanders, clamps, measuring tape, and a level.
Once you have a clear design in mind, create a detailed sketch or drawing for reference. You can also use online resources or woodworking software to visualize your frame and generate cut lists.
2. Cutting and Assembly
With your design finalized, you are ready to start cutting and assembling the frame. Here's a general guide for construction:
- Cut the Wood: According to your cut list, carefully cut the wood components using a saw, ensuring precise measurements and square cuts.
- Create Mortise and Tenon Joints: For a strong and traditional joinery technique, use mortise and tenon joints to connect the frame's major components, such as the headboard, footboard, and side rails. Make sure the mortise and tenon dimensions are accurate and consistent.
- Assemble Side Rails: Join the side rails using the mortise and tenon joints. Use wood glue and clamps for secure connections. Ensure the rails are parallel and level.
- Attach Headboard and Footboard: Connect the headboard and footboard to the side rails, ensuring the headboard is securely fastened. Use mortise and tenon joints, pocket holes, or robust wood screws for strong connections.
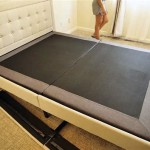
- Construct Slat Support: If you opt for slats, create a slat support system using wooden strips or metal brackets. Ensure the slats are spaced evenly to provide adequate mattress support.
- Add Finishing Touches: Make any necessary adjustments or add decorative features to the frame, such as molding, trim, or embellishments.
As you assemble the frame, meticulously check for squareness and levelness after each step. Use clamps to hold components in place while glue dries, ensuring secure and stable connections.
3. Finishing and Refinement
The final stage involves finishing the bed frame to enhance its appearance and protect the wood. Here's a step-by-step guide:
- Sanding: Thoroughly sand the frame using progressively finer grit sandpaper. Smooth out any rough edges, imperfections, and markings. Sanding ensures a smooth surface for the finish.
- Stain or Paint: Apply a stain or paint to the frame, depending on your desired aesthetic. Ensure the stain or paint is compatible with the chosen wood type. Apply multiple coats for a rich and durable finish.
- Sealant: Apply a sealant to protect the wood from moisture, dirt, and scratches. Choose a sealant that complements your stain or paint. A polyurethane sealant offers excellent durability and water resistance.
- Hardware: Install any necessary hardware, such as bed rails, mattress supports, or headboard embellishments. Ensure all hardware is secure and functional.
Allow adequate drying time for the stain, paint, and sealant. Wipe off any excess materials with a clean cloth.
By following these steps, you can create a beautiful and functional queen-size wooden bed frame that will serve as a focal point in your bedroom for years to come. Remember to prioritize safety, accuracy, and attention to detail throughout the construction process. Enjoy the satisfaction of building a piece of furniture with your own hands.

Diy Bed Frame Wood Headboard 1500 Look For 200 A Piece Of Rainbow

Diy Bed Frame Wood Headboard 1500 Look For 200 A Piece Of Rainbow

Plans Queen Size Bed Plan Project Small Wood Projects From Scrap Frame Diy

Queen X Barn Door Farmhouse Bed Plan Her Tool Belt

Diy Bed Frame Wood Headboard 1500 Look For 200 A Piece Of Rainbow

Diy Bed Frame Plans How To Make A With Pete

Diy Full Or Queen Size Storage Bed Shanty 2 Chic

Diy Bed Frame Wood Headboard 1500 Look For 200 A Piece Of Rainbow

Diy 5 Minutes Bed Frame

3 Ways To Build A Wooden Bed Frame Wikihow
Related Posts