Queen Farmhouse Bed Frame Plans: A Comprehensive Guide
Building a queen farmhouse bed frame is a rewarding project that allows you to create a unique and beautiful centerpiece for your bedroom. This style, characterized by its simple yet elegant design, often features exposed wood, clean lines, and a rustic charm, seamlessly blending with various decor styles. This guide provides a comprehensive overview of the key considerations, materials, and steps involved in constructing your own queen farmhouse bed frame.
1. Planning Your Design: Key Decisions
Before diving into the construction process, it's essential to plan the details of your bed frame. This initial step involves making crucial decisions that will shape the final design.
Firstly, consider the overall style you desire. Do you prefer a classic farmhouse aesthetic with a traditional headboard, or a more modern interpretation with a simple slatted design? Secondly, determine the desired height of the headboard and footboard, as well as the width of the frame. The headboard height can influence the visual impact of the bed, while the width should comfortably accommodate the queen-sized mattress and allow for ample space around it. Finally, select the type of wood you wish to use. Common choices include pine, oak, or maple, each offering distinctive appearances and properties. Pine is known for its affordability and light color, oak is durable and exhibits rich grain patterns, while maple offers a harder, more resistant surface.
2. Gathering Materials and Tools: Essential Equipment
Once the design is finalized, you'll need to gather the necessary materials and tools. This list may vary depending on the specific design, but here are some essential items:
- Lumber: Select lumber based on your desired wood type and dimensions. Ensure the wood is properly dried and free of knots and imperfections.
- Hardware: This includes screws, nails, brackets, dowels, and wood glue. Consider using galvanized or stainless steel hardware for enhanced durability.
- Tools: You'll need a circular saw, jigsaw, drill, screwdriver, measuring tape, level, hammer, and clamps, among others.
- Finishing Materials: Sandpaper, wood stain, primer, and paint are essential for achieving the desired finish.
3. Building the Frame: Step-by-Step Construction
Once you have everything assembled, you can begin constructing the bed frame. The following steps provide a general outline for building a typical queen farmhouse bed frame:
A. Headboard and Footboard Construction
The headboard and footboard are often the most visually prominent parts of the bed frame. They can be constructed using various methods, including:
- Slatted design: This involves creating a series of vertical slats that are joined to a horizontal headboard or footboard frame.
- Solid panel design: This involves a single, large panel of wood for the headboard or footboard.
- Custom design: You can create your own unique design using various techniques, such as carving, molding, or adding accents.
Ensure the headboard and footboard are sturdy and well-supported to prevent sagging or instability.
B. Side Rails and Support Structure
The side rails provide the structure that supports the mattress. They are typically made of 2x4 lumber and can be joined to the headboard and footboard using various methods, including:
- Pocket holes: This involves drilling angled holes in the side rails and using pocket screws to fasten them to the headboard and footboard.
- Mortise and tenon joints: This traditional technique involves cutting interlocking joints that provide a strong and secure connection.
- Butt joints: This simpler method involves joining the side rails directly to the headboard and footboard using screws and wood glue.
Consider adding additional support for the mattress, such as center supports or slats running perpendicular to the side rails.
C. Finishing Touches
Once the frame is assembled, it's time to add finishing touches. This includes:
- Sanding: Sand the entire frame using progressively finer grits of sandpaper to create a smooth surface and remove any rough edges.
- Staining or painting: Select a finish that complements your decor style. Staining allows the natural beauty of the wood to shine through, while painting offers a more modern look.
- Adding hardware: Install any necessary hardware, such as bed frame brackets or mattress supports.
Finally, clean the frame thoroughly and allow the finish to fully dry before using the bed.

Queen X Barn Door Farmhouse Bed Plan Her Tool Belt

Farmhouse Bed Queen Sized Diy Frame Bedding

Queen X Barn Door Farmhouse Bed Plan Her Tool Belt

Farmhouse Bed Queen Sized Ana White

Free Plans For Making A Queen Size Farmhouse Bed Edhart Me

How To Build A Farmhouse Queen Bed Frame Diy Hometalk

Queen X Barn Door Farmhouse Bed Plan Her Tool Belt

How To Build A Farmhouse Queen Bed Frame Diy Hometalk

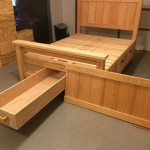
Diy Plan Farmhouse Bed With Storage Queen

Farmhouse Storage Bed With Drawers Queen Ana White
Related Posts