Simple Queen Size Bed Frame Plans: Building a Sturdy and Stylish Sleep Sanctuary
A queen-size bed frame provides a spacious and comfortable sleeping area, but finding a suitable frame that fits your style and budget can be challenging. Fortunately, building a simple queen-size bed frame from scratch offers a rewarding and cost-effective solution. This article will guide you through the process, providing straightforward plans and essential tips to create a sturdy and stylish bed frame that complements your bedroom décor.
Choosing the Right Materials
Before you begin, selecting the right materials is crucial for ensuring the stability and longevity of your bed frame. Here's a breakdown of common options:
Wood
Wood is a popular choice for bed frames due to its natural beauty, durability, and versatility. Consider the following options:
- Pine: Affordable and lightweight, but prone to scratches and dents.
- Oak: Strong and durable, with a beautiful natural grain pattern, but more expensive.
- Maple: Hard and resistant to scratches, offering a smooth and elegant finish.
Metal
Metal offers a modern aesthetic and exceptional strength. Common choices include:
- Steel: Durable and affordable, readily available in various finishes.
- Aluminum: Lightweight and corrosion-resistant, often used for contemporary designs.
Other Considerations
Apart from the primary material, consider these factors:
- Thickness: Thicker lumber or metal provides greater stability and durability.
- Finish: Choose a finish that complements your existing furniture and desired style.
- Hardware: Ensure you have enough screws, bolts, nuts, and other hardware for assembly.
Creating a Simple Queen-Size Bed Frame Design
A simple queen-size bed frame design typically includes a headboard, footboard, and side rails. For this project, consider a minimalist design with clean lines and minimal embellishments. Here's a basic plan:
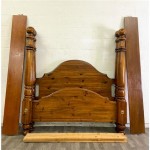
Headboard
The headboard can be a simple rectangular panel or a more decorative design. Consider the height and width you desire. You can use a single piece of lumber or create a frame with multiple pieces joined together.
Footboard
The footboard can be similar in design to the headboard, but shorter in height. Ensure it provides enough support for the mattress. You can create a simple panel design or opt for a more elaborate style.
Side Rails
The side rails connect the headboard and footboard and support the mattress. These can be simple boards with minimal embellishments. Make sure the side rails are sturdy and long enough to accommodate the width of the mattress.
Step-by-Step Construction Guide
Once you have chosen your materials and finalized your design, follow these steps for constructing your queen-size bed frame:
1. Cut the Wood or Metal
Using a saw, accurately cut the wood or metal according to your design measurements. Ensure all cuts are precise for a perfect fit during assembly.
2. Sand the Wood (If Applicable)
If using wood, sand all surfaces smooth to create a pleasant finish and prevent splinters. Start with a coarse grit sandpaper and progressively move to finer grits for a smoother feel.
3. Stain or Paint (If Desired)
Apply a stain or paint to enhance the appearance of your wood or metal bed frame. Let the finish dry completely before assembling the frame.
4. Assemble the Headboard and Footboard
Join the pieces of wood or metal together to create the headboard and footboard according to your design. Use wood glue and screws or bolts to secure the joints.
5. Assemble the Side Rails
Construct the side rails, ensuring they are the correct length to accommodate the mattress. Secure the joints with wood glue and screws or bolts.
6. Connect the Headboard, Footboard, and Side Rails
Attach the side rails to the headboard and footboard, creating a complete frame. Use wood glue and screws or bolts to secure the joints.
7. Add Any Decorative Elements (Optional)
If desired, add decorative elements like moldings, trim, or hardware to enhance the appearance of your bed frame.
8. Apply a Protective Finish (Optional)
Apply a protective finish, such as polyurethane or varnish, to protect your bed frame from scratches, dents, and moisture.
9. Allow the Finish to Dry Completely
Before placing the mattress on the frame, ensure the finish is completely dry to prevent staining or damage.
By following these straightforward plans and steps, you can create a sturdy and stylish queen-size bed frame that meets your needs and complements your bedroom décor.

Simple Queen Bed Frame Diy Plans

Diy Bed Frame Wood Headboard 1500 Look For 200 A Piece Of Rainbow

Diy Bed Frame Wood Headboard 1500 Look For 200 A Piece Of Rainbow

Queen X Barn Door Farmhouse Bed Plan Her Tool Belt

Essential Platform Bed Frame Ana White

Essential Platform Bed Frame Ana White
:max_bytes(150000):strip_icc()/buildsomething-d9182ea947314a8dbbba2bc9f0708019.jpg?strip=all "14 Free Diy Platform Bed Plans")
14 Free Diy Platform Bed Plans

How To Build A Modern Platform Bed For 125 Diy Beautify Creating Beauty At Home

How To Build A Queen Size Storage Bed Addicted 2 Diy

Diy Bed Frame Wood Headboard 1500 Look For 200 A Piece Of Rainbow