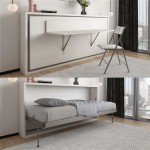
Building a Queen Size Bed Frame with Storage: A DIY Guide
A queen-size bed frame with storage offers a practical solution for maximizing space in any bedroom. It provides ample room for comfortable sleep while also offering hidden storage compartments for bedding, clothes, or seasonal items. Building such a bed frame yourself is not only a rewarding DIY project but also a cost-effective way to create a custom piece that perfectly suits your needs and style.
This guide will walk you through the process of constructing a queen-size bed frame with storage, from choosing the right materials and tools to assembling the frame and adding storage features. While some basic woodworking experience is helpful, this project is achievable for beginners with careful planning and attention to detail.
Choosing Materials and Tools
The first step in building a queen-size bed frame with storage is to select the appropriate materials and tools. The specific materials will depend on your desired aesthetic and budget. However, some common choices include:
- Wood: Pine, plywood, or hardwood are popular choices for bed frames due to their affordability and durability. Use 2x4s for the main frame and plywood for the storage compartments.
- Hardware: You will need wood screws, bolts, nuts, and corner brackets to assemble the frame and storage drawers.
- Storage solutions: Consider using drawers, shelves, or a combination of both to create the desired storage space. Choose drawer slides that are compatible with the weight of your belongings.
- Finish: Select a stain, paint, or varnish to protect and enhance the appearance of the wood.
- Cut the wood: Measure and cut the wood pieces for the frame according to your desired dimensions and desired storage configuration.
- Assemble the frame: Use screws or bolts to join the wood pieces together, creating a sturdy rectangular frame for the bed.
- Add support slats: Install support slats across the frame to evenly distribute weight and provide a stable surface for the mattress.
- Build the storage compartments: Construct the storage compartments, such as drawers or shelves, using plywood and appropriate hardware.
- Attach the storage compartments to the frame: Secure the storage compartments to the main frame using screws or bolts. Ensure they are aligned and properly secured.
- Sanding: Smooth out any rough edges and imperfections with a sander.
- Finishing: Apply the desired stain, paint, or varnish to enhance the look and protect the wood from wear and tear.
- Assembly: Assemble the complete bed frame, including the storage compartments. Make sure all parts are securely fastened.
In addition to the materials, gather the necessary tools, such as a saw, drill, screwdriver, sander, measuring tape, level, and safety gear.
Constructing the Bed Frame
Once you have gathered the necessary materials and tools, you can begin constructing the bed frame. Follow these steps:
Finishing and Assembly
After constructing the bed frame and storage compartments, it's time to finish the project. This involves:
Building a queen-size bed frame with storage is a challenging but rewarding project that requires careful planning and attention to detail. By following these steps, you can create a custom-made bed that meets your specific needs and budget.
Consider adding personal touches such as decorative trim, custom handles, or a headboard to personalize the bed frame and create a truly unique piece.

Diy Full Or Queen Size Storage Bed Shanty 2 Chic

How To Build A Queen Size Storage Bed Addicted 2 Diy Frame With

Diy Queen Bed Frame With Storage Plans Wilker Do S

How To Build A Queen Size Storage Bed Addicted 2 Diy

Brandy Scrap Wood Storage Bed With Drawers Queen Ana White

Diy Platform Bed With Storage Modern Builds

Queen Size Platform Bed Frame With Storage Drawers Sawdust Girl

How To Build A Queen Size Storage Bed Addicted 2 Diy

Full Size Bed Designs Diy Storage Platform Frame

How To Build A Queen Size Bed With Drawer Storage