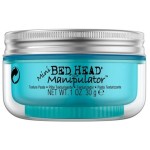
Bed Head Deep Waver Tutorial
The Bed Head Deep Waver is a popular styling tool for creating voluminous, textured waves. This tutorial provides a comprehensive guide to using the waver effectively, ensuring optimal results and minimizing potential hair damage.
Before beginning the waving process, it is crucial to prepare the hair properly. Clean, dry hair is essential for achieving long-lasting waves and preventing heat damage. Begin by washing the hair with a clarifying shampoo to remove any product buildup or residue. Follow with a lightweight conditioner, focusing application on the ends. Thoroughly dry the hair using a hairdryer. Applying a heat protectant spray is a critical step in safeguarding the hair from the high temperatures of the waver. Distribute the heat protectant evenly throughout the hair, paying particular attention to the ends.
Sectioning the hair is key to achieving uniform waves. Divide the hair into manageable sections, typically starting at the nape of the neck and working upwards. Clips can be used to secure the sections and maintain organization throughout the styling process. The size of the sections can be adjusted based on hair thickness and desired wave size. Smaller sections generally result in more defined waves, while larger sections produce looser, more voluminous waves.
With the waver heated to the appropriate temperature setting, the waving process can begin. The waver's temperature should be adjusted based on hair type and texture. Fine or damaged hair requires lower temperatures, while thicker hair can tolerate higher heat settings. Consult the waver's instructions for recommended temperature ranges. Starting with the bottom sections, clamp the waver onto a section of hair, holding it in place for the recommended time. Typically, this is between 5-10 seconds, depending on the hair's thickness and the desired wave intensity. Avoid holding the waver in one place for too long, as this can cause heat damage and create uneven waves.
Working methodically through each section, repeat the clamping process, ensuring consistent placement of the waver along the hair shaft. Maintain even spacing between each clamp to create uniform waves. For a more natural look, avoid clamping the waver directly on the ends of the hair. This prevents the ends from appearing overly crimped or unnatural. Continue this process, working upwards through the sections until all the hair has been waved.
Once all sections have been waved, allow the hair to cool completely before further styling. This allows the waves to set and ensures longer-lasting results. After the hair has cooled, a wide-tooth comb or fingers can be used to gently separate the waves, creating a softer, more natural appearance. Avoid using a brush, as this can disrupt the wave pattern and create frizz.
To enhance the longevity of the waves and add definition, a finishing product can be applied. A light-hold hairspray or texturizing spray can be used to maintain the wave pattern and add volume. Avoid using heavy products, as these can weigh down the hair and make the waves appear flat. For added shine, a shine serum can be applied sparingly to the ends of the hair.
Proper maintenance of the Bed Head Deep Waver is essential for ensuring its longevity and optimal performance. After each use, allow the waver to cool completely before cleaning and storing. Use a soft, damp cloth to wipe down the barrels, removing any product residue or buildup. Avoid immersing the waver in water or using harsh cleaning chemicals. Store the waver in a safe, dry place, away from heat and moisture.
Different hair types and textures may require adjustments to the waving process. Fine hair may require lower temperatures and shorter clamping times to prevent damage and achieve desired results. Thicker hair may benefit from higher temperatures and longer clamping times to create more pronounced waves. Experimentation with different temperature settings and clamping times can help determine the optimal approach for individual hair characteristics.
Troubleshooting common issues can help achieve desired results. If the waves are not holding, ensure the hair is completely dry before waving and that a heat protectant is used. Consider using smaller sections of hair and holding the waver in place for slightly longer. If the waves appear too crimped or unnatural, avoid clamping the waver directly on the ends and use a wide-tooth comb or fingers to gently separate the waves after they have cooled. If the hair appears damaged or dry, lower the temperature setting and ensure adequate use of heat protectant.
Variations in wave styles can be achieved by adjusting the clamping technique and sectioning. For deeper, more defined waves, hold the waver in place for longer and use smaller sections. For looser, more voluminous waves, use larger sections and hold the waver for a shorter duration. Experimenting with different techniques can help achieve a variety of looks and personalize the waving process.

A Quick Beachy Wave Hair Tutorial With The Bed Head Artist Deep Waver Tool Merrick S Art

Beach Waves Hair Tutorial Love Grows Wild

A Quick Beachy Wave Hair Tutorial With The Bed Head Artist Deep Waver Tool Merrick S Art

Bed Head Wave Artist Tutorial

Bed Head Wave Artist Deep Waver Hairstylist Review And Tutorial 2024

A Quick Beachy Wave Hair Tutorial With The Bed Head Artist Deep Waver Tool Merrick S Art

Pin On Hair

Bed Head Wave Artist Mermaid Hair Tutorial

How To Use A Beach Waver Bed Head Tiktok Search

How I Wave My Hair Using Bed Head S Artist In 2024 Waves Tutorial Waver Iron