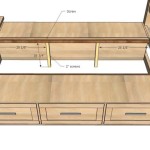
How to Make a Bed Frame From Wood
Creating a bed frame from wood is a rewarding DIY project that allows for customization and personalization. It enables you to craft a unique piece of furniture that complements your bedroom's aesthetic and fits your specific needs. This article will guide you through the process of building a sturdy and stylish bed frame from scratch, providing detailed instructions and tips for success.
Planning and Design
The first step in building a wooden bed frame is careful planning and design. Begin by determining the desired dimensions of the bed frame, considering the size of your mattress and the overall space available in your bedroom. Sketch out a basic design and decide on the style and features you want to incorporate.
Consider using a combination of wood types for visual interest and structural support. For example, you could use hardwood for the headboard and footboard for durability and softer wood for the side rails. Consider adding decorative elements like moldings, carvings, or paint to enhance the aesthetics of your design.
Once you have a clear design in mind, create a detailed plan with measurements for each component. This will ensure that all parts fit together perfectly and that the frame is structurally sound. It is also helpful to create cutting diagrams and assembly instructions to guide you throughout the construction process.
Materials and Tools
To build a wooden bed frame, you will need a range of materials and tools. The specific requirements will depend on the design and complexity of your project. However, some common materials include:
- Wood planks: Choose suitable wood types based on your design and budget.
- Wood screws: Select screws of appropriate length and diameter for secure connections.
- Wood glue: Use a high-quality wood glue for strong, durable joints.
- Wood filler: Fill any gaps or imperfections in the wood with wood filler before painting or staining.
- Paint or stain: Choose your preferred finish to complement the style of your bedroom.
- Sandpaper: Use sandpaper to smooth the wood and create a uniform surface for painting or staining.
- Measuring tape: Ensure accurate measurements for precise cuts and assembly.
- Saw: A circular saw, miter saw, or table saw is essential for cutting wood.
- Drill: Use a drill with appropriate drill bits for creating pilot holes and assembling the frame.
- Level: Ensure that the bed frame is level and stable.
- Clamps: Secure wood pieces during assembly to prevent movement.
Construction Process
Constructing a wooden bed frame involves several key steps. These instructions provide a general outline, but specific steps may vary depending on your design:
- Cut the wood: Following your detailed plan and cutting diagrams, carefully cut the wood planks using a saw. Ensure all cuts are precise and at the correct angles.
- Assemble the headboard and footboard: Depending on your design, these components might involve joining multiple pieces of wood using screws, glue, or a combination of both.
- Create the side rails: Cut the side rails to length and attach them to the headboard and footboard using screws and glue.
- Add support slats: If you are not using a slatted base, cut and attach support slats to the side rails. These slats will provide a solid base for the mattress.
- Sand and finish: Once the frame is assembled, sand all surfaces thoroughly to remove rough edges and create a smooth finish. Apply paint or stain to the frame according to your desired aesthetic.
Tips for Success
Building a wooden bed frame requires attention to detail and proper techniques. Here are some helpful tips for ensuring a successful project:
- Use quality materials: Invest in durable wood and hardware for a long-lasting frame.
- Plan carefully: Create detailed plans and cutting diagrams to minimize errors and ensure accurate dimensions.
- Measure twice, cut once: Double-check all measurements before cutting to avoid wasting materials.
- Use pilot holes: Drill pilot holes before screwing into wood to prevent splitting.
- Clean up as you go: Remove sawdust and debris regularly to maintain a clean workspace.
- Take your time: Building a bed frame takes time and effort, so be patient and work systematically.
Building a wooden bed frame allows you to create a personalized and unique piece of furniture that reflects your individual style. By following these instructions and tips, you can craft a durable and stylish bed frame that will last for years to come.

Diy Bed Frame Wood Headboard 1500 Look For 200 A Piece Of Rainbow

Diy Bed Frame Wood Headboard 1500 Look For 200 A Piece Of Rainbow

Diy 5 Minutes Bed Frame

Diy Bed Frame Plans How To Make A With Pete

Diy Bed Frame Wood Headboard 1500 Look For 200 A Piece Of Rainbow

Diy Reclaimed Wood Bed West Elm Inspired Orc Week 3

Easy Diy Platform Bed Frame For A King With Instructions

Diy Bed Frame Angela Marie Made

How To Make A Wood Bed Frame The Space Between

3 Ways To Build A Wooden Bed Frame Wikihow


